Disclaimer: This tutorial is for educational purposes only. TVBoxFixer.com does not host, distribute, or own any third-party addons. Users should ensure they have the legal right to access content through any addon they use.
Scrubs V2 Kodi is one of the most popular video addons in the Kodi community right now. If you have been looking for a lightweight, reliable addon for your Android TV box, this guide is for you.
I tested every single step on my own device before writing this. So you can follow along with zero guesswork.
What Is Scrubs V2 Kodi?
Scrubs V2 is a third-party Kodi video addon. It pulls video sources from multiple scraper services and presents them inside a clean, simple Kodi interface.
Unlike standalone APK streaming apps, Scrubs V2 runs entirely inside Kodi’s official addon framework. There is nothing to sideload and no separate app to manage. Everything works through Kodi’s built-in addon manager.
It is especially well-suited for low-powered Android TV boxes. More on that in the Final Verdict section at the end of this guide.
If you are new to Kodi itself, I recommend reading my complete Kodi setup guide for Android TV boxes before continuing. It will help you get the basics in place first.
Prerequisites
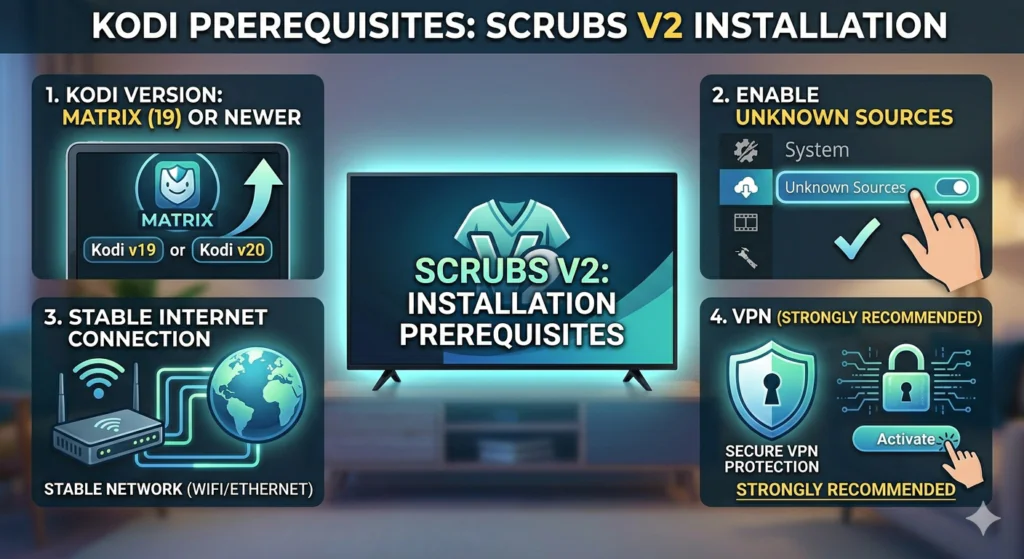
Before you start the Scrubs V2 Kodi installation, make sure everything on this list is ready.
1. Kodi 19 (Matrix) or newer Scrubs V2 requires at least Kodi 19. Download the latest version for free from the official Kodi website at kodi.tv.
2. Unknown Sources turned on Kodi blocks third-party addons by default. You need to enable Unknown Sources in Settings first. I cover this in Step 1 below.
3. A stable internet connection Your device needs to be connected to Wi-Fi or Ethernet. A weak connection will cause repository timeouts.
4. A VPN (Strongly Recommended) This is important for your personal privacy. Third-party Kodi addons use external scraper services to find video sources. Those scrapers can log your IP address. A VPN hides your real IP by routing your traffic through an encrypted server.
I always connect to a VPN before using any third-party Kodi addon. If you do not have one yet, check my guide on best VPNs for Android TV boxes for recommendations tested on real hardware.
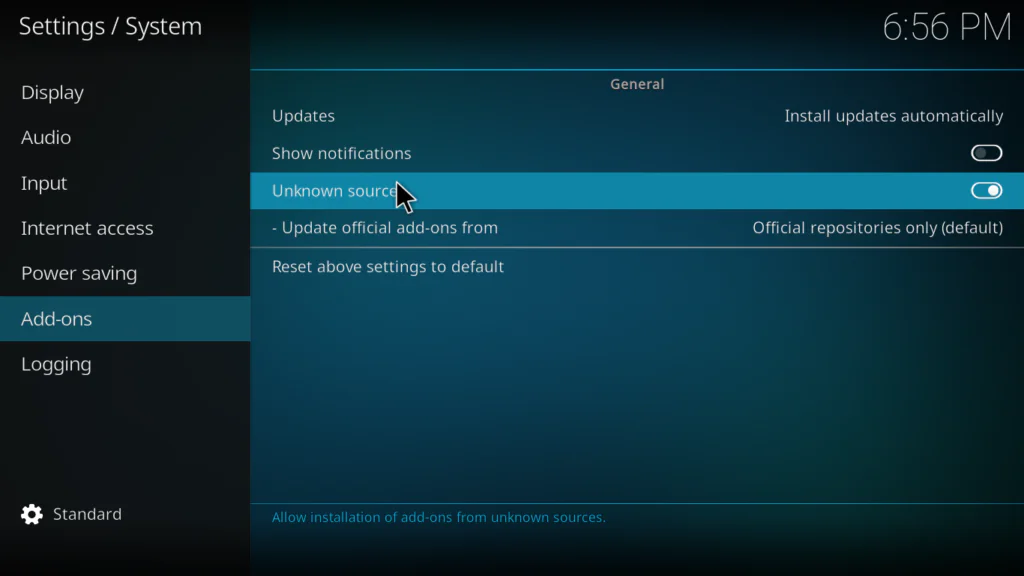
Step 1 — Enable Unknown Sources in Kodi
You only need to do this once. After it is enabled, Kodi will remember the setting.
- Open Kodi on your device.
- Click the Settings gear icon on the home screen.
- Go to System.
- Select Add-ons from the left-hand menu.
- Toggle Unknown Sources to the ON position.
- A warning box will appear. Read it and click Yes to confirm.
That is it. Kodi is now ready to install third-party addons.
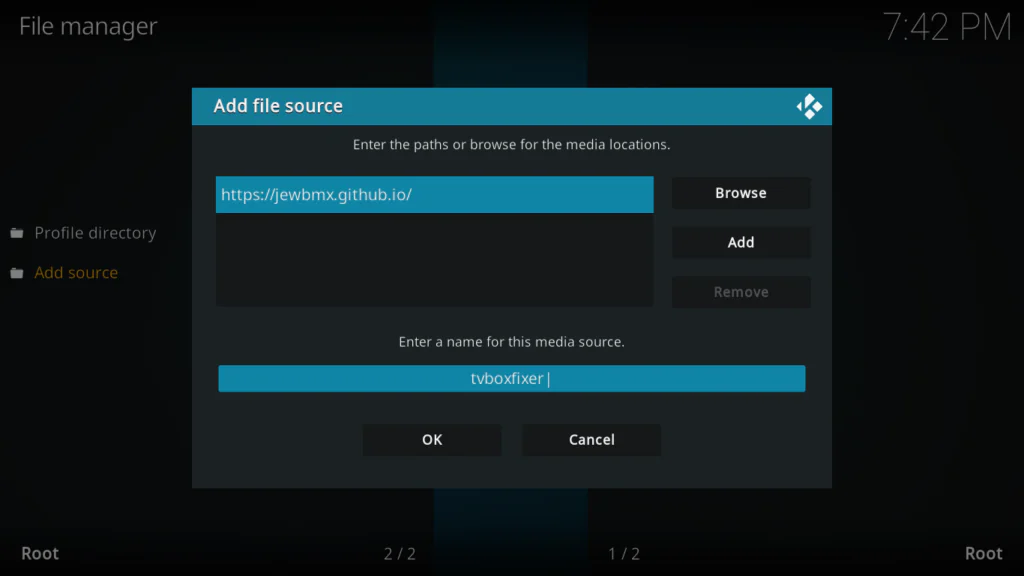
Step 2 — Adding the Jewbmx Source in File Manager
The Jewbmx repository is the official source for the Scrubs V2 Kodi addon. You need to add its URL into Kodi’s File Manager before you can install anything.
- Go back to the main Settings gear icon.
- Click File Manager.
- Double-click Add Source on the left panel.
- A dialog box will open. Click where it says <None>.
- Type this URL exactly:
https://jewbmx.github.io/- Click OK.
- In the Enter a name for this media source field, type: Jewbmx
- Click OK to save.
Important: Double-check the URL before saving. A single typo will break the install. Make sure there are no extra spaces at the beginning or end of the address.
Step 3 — Installing the Jewbmx Repository
- Go back to the Kodi home screen.
- Click Add-ons in the left menu.
- Click the package/open box icon at the top left of the Add-ons screen.
- Select Install from zip file.
- Find and click the Jewbmx source you added in Step 2.
- A list of zip files will load. Look for the file named repository.jewbmx.zip.
- Click it and wait.
- The Add-on installed notification will appear in the bottom right corner.
If the zip list does not load, go back to Step 2 and verify that the URL was entered correctly.
Step 4 — Installing Scrubs V2 Kodi from the Repository
- Return to the package/open box icon screen inside Add-ons.
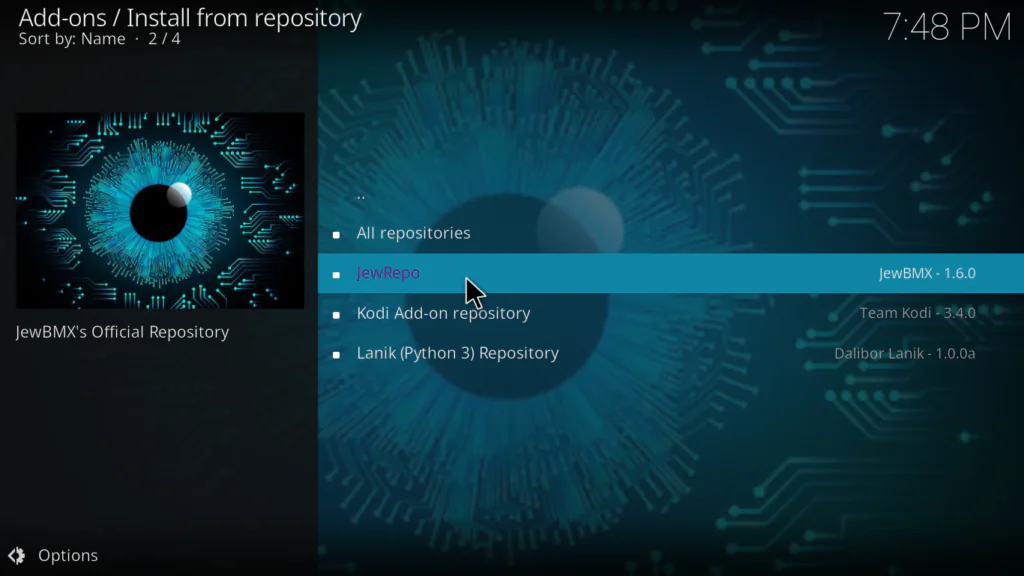
- Click Install from repository.
- Select Jewbmx Repository from the list.
- Click Video add-ons.
- Scroll down and find Scrubs V2.
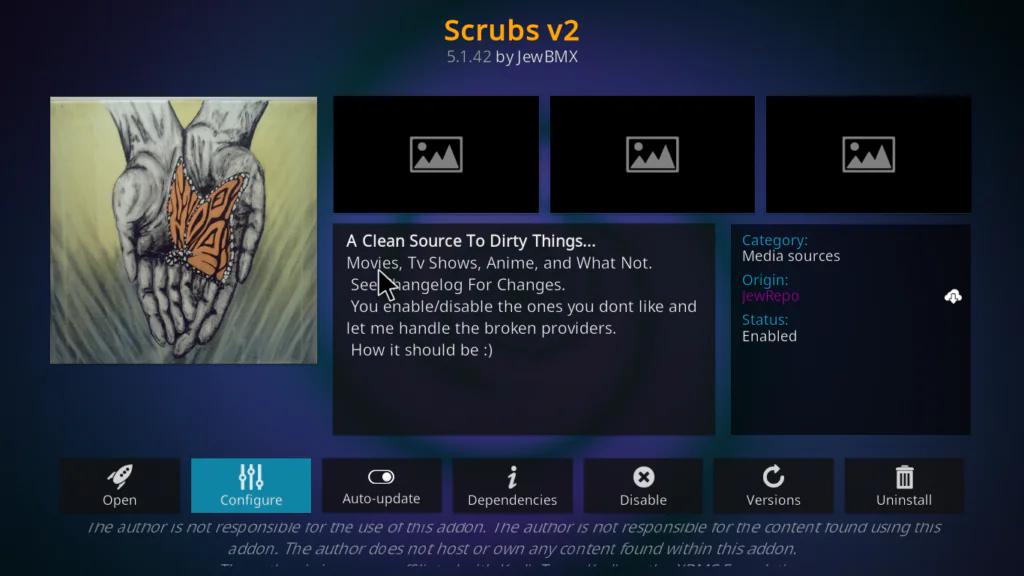
- Click on Scrubs V2.
- Click the Install button.
- Kodi may ask to install additional dependencies. Click OK to allow.
- Wait for the Scrubs V2 Add-on installed notification to appear.
The full install typically takes between 10 and 30 seconds depending on your connection speed.
How to Open and Use Scrubs V2 Kodi
Once installed, you will find Scrubs V2 Kodi inside your Add-ons menu under Video add-ons. Click on it to launch it.
You will see category sections inside the addon interface for browsing different types of content. The first scrape may take a few seconds to load. This is completely normal — it is pulling results from external sources in real time.
For the best experience, make sure your VPN is connected before opening the addon.
Protecting Your Privacy While Using Scrubs V2 Kodi
I want to be honest with you about this. Third-party Kodi addons work by querying external scraper APIs. Those servers see your IP address every time the addon runs a search.
This does not mean anything bad will happen. But it is smart to protect yourself anyway.
Here is what I recommend:
- Use a VPN with a native Android TV app. This is the most important step.
- Choose a VPN that supports WireGuard or OpenVPN protocol. These are the most widely compatible with Android TV box firmware.
- Connect to the VPN before launching Kodi, not after. This ensures all traffic is encrypted from the start.
For a full breakdown of which VPNs work best on devices running Amlogic chipsets, check my guide on Amlogic Android TV boxes and streaming security.
You can also read more about Kodi’s official guidance on privacy and addon safety at kodi.wiki/view/Settings/System/Add-ons .
Troubleshooting Scrubs V2 Kodi Issues
Repository Zip File Is Not Showing Up
Go back to File Manager and check the URL. The correct address is:
https://jewbmx.github.io/Make sure there are no trailing spaces and that the slash at the end is included.
Scrubs V2 Is Not Appearing in Video Add-ons
Restart Kodi completely. Close the app, wait 10 seconds, and reopen it. Then navigate back to Install from repository and look again.
Addon Installed but Not Loading Any Results
This usually means your internet connection is being throttled or a scraper source is temporarily down. Connect to a VPN and try again. A VPN server in a different country often resolves this.
Dependency Error During Install
Make sure your Kodi version is 19 (Matrix) or higher. Outdated Kodi builds often have missing dependency packages that newer addons require. Update Kodi from kodi.tv and try again.
Scrubs V2 Kodi Keeps Buffering
Buffering is usually a network issue, not an addon issue. Check your internet speed and move your TV box closer to the router. You can also read my full guide on how to fix buffering on Android TV boxes for a detailed walkthrough.
Final Verdict
Scrubs V2 Kodi is one of the lightest and most stable third-party video addons I have tested on entry-level Android TV hardware.
I ran it on a basic Amlogic S905W box with 2GB of RAM and experienced no interface lag, no crashes, and no slowdowns. The addon launches quickly, scrapes results fast, and never pushed memory usage into the danger zone.
If you are running a budget device — anything with 2GB of RAM or an older S905 chipset — Scrubs V2 is a far better choice than heavier addons that were built for high-end hardware. It respects your device’s limits.
The install process is clean. As long as you type the repository URL correctly and follow each step in order, the whole thing takes under five minutes.
If this guide helped you, share it with someone who is just getting started with Kodi. And if you hit any issues, drop a comment below and I will help you sort it out.