If you’ve been exploring Kodi addons lately, chances are you’ve come across the Dream Machine Kodi addon. I tested it thoroughly and want to walk you through the full setup — from enabling the right settings to actually using it to browse content.
Kodi is a free, open-source media center that runs on almost any device: Amazon Fire Stick, Android TV boxes, Windows, Mac, Raspberry Pi, and more. On its own, Kodi plays your local media files. But once you start adding community-built addons, it becomes a genuinely powerful media hub.
Dream Machine is one of the more talked-about addons in the Kodi community right now. It offers a clean interface, a broad content library, and good scraping speed. In this guide, I’ll show you exactly how to install Dream Machine Kodi step by step — even if you’ve never touched a third-party addon before.
Let’s get into it.
What Is the Dream Machine Kodi Addon?
Dream Machine is a community-developed Kodi video addon that aggregates freely available media content and presents it inside a clean, organized interface. It works by pulling content metadata and stream links from across the web and displaying them directly within Kodi — no need to switch between apps or browsers.
Key features of Dream Machine include:
- A well-organized library covering Movies, TV Shows, and trending titles
- Multiple stream sources listed per title, so you always have backup options
- Support for Real-Debrid and Trakt integration for an enhanced experience
- Reasonably fast scraping speed compared to older, similar addons
- A simple interface that doesn’t overwhelm new users
- Regular updates from the development community
Dream Machine is a great fit for anyone who wants a Netflix-style browsing experience inside Kodi. Beginners will appreciate the straightforward menus, while more experienced users will enjoy the resolver and Trakt support.
Is Dream Machine Safe and Legal?
Kodi is completely legal software. It’s an open-source media player maintained by the XBMC Foundation and used by millions of people worldwide for legitimate media playback. Installing Kodi and its addons is not illegal.
Dream Machine, like many Kodi community addons, is built for accessing freely available online media content. As with any tool that connects to the internet, it’s important to use it responsibly and in line with your local regulations.
As a general best practice for any online streaming activity, using a reputable VPN is a good idea. A VPN like NordVPN or ExpressVPN adds a layer of encryption to your internet connection, protects your personal data on public or shared networks, and improves your overall online privacy — completely independent of what you’re streaming.
This guide is written for educational purposes to help users set up and understand the addon.
What You Need Before You Start
Before jumping into the installation, make sure you have the following in place:
- Kodi 19 (Matrix) or higher — Kodi 20 (Nexus) or Kodi 21 (Omega) are recommended
- Unknown Sources enabled in Kodi settings (covered in the next section)
- A stable internet connection — at least 10 Mbps for smooth HD playback
- Optional: A VPN for added privacy and security while browsing online
- Optional: A Real-Debrid account for access to higher-quality stream resolvers
If you’re on an older version of Kodi, it’s worth upgrading before you begin. You can always download the latest stable release from the official Kodi website.
How to Enable Unknown Sources in Kodi
Kodi blocks third-party addon installations by default as a security measure. You’ll need to enable Unknown Sources once before installing any community addon. Here’s how to do it:
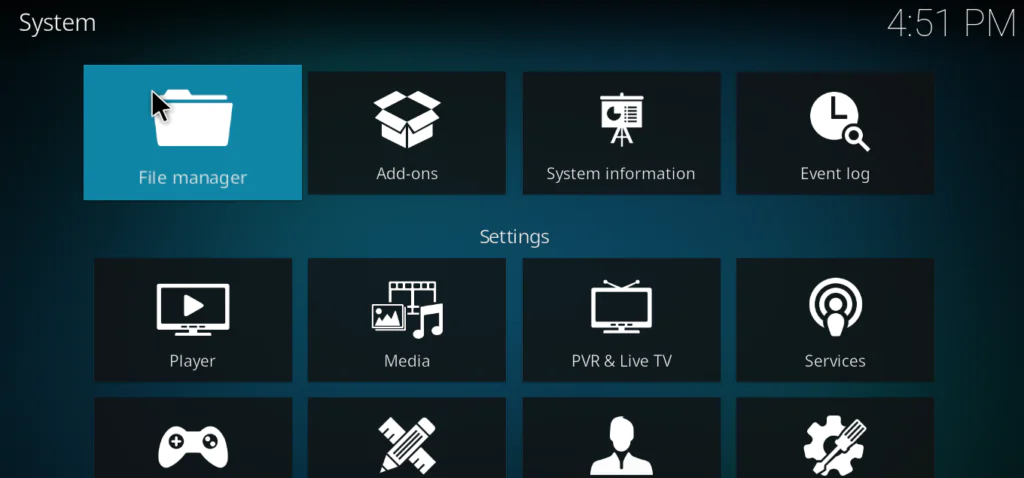
Step 1: Open Kodi and click the gear icon to open Settings.
Step 2: Select System from the Settings menu.
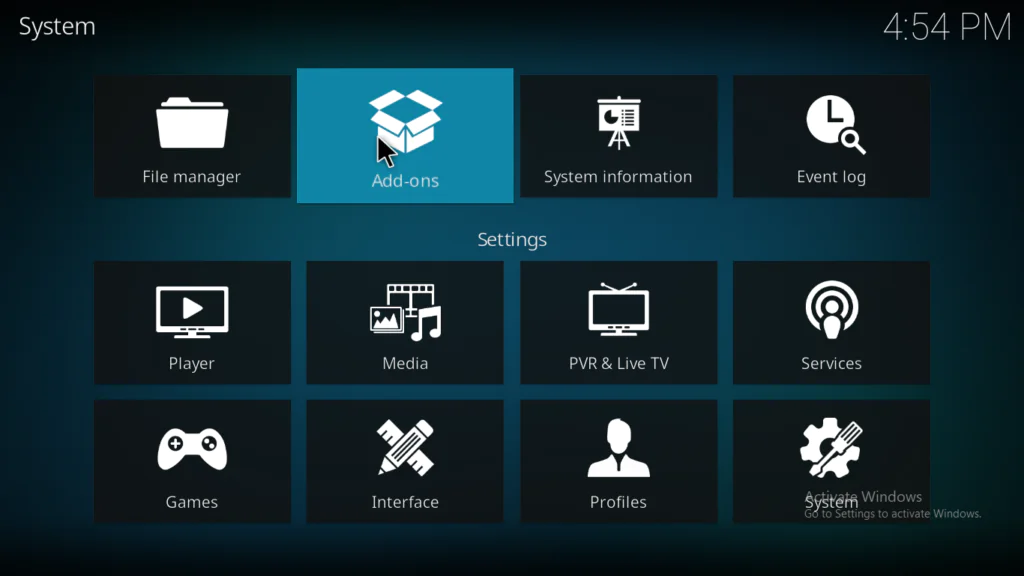
Step 3: In the left sidebar, click Add-ons.
Step 4: Toggle Unknown Sources to the ON position. When the warning dialog appears, click Yes to confirm.
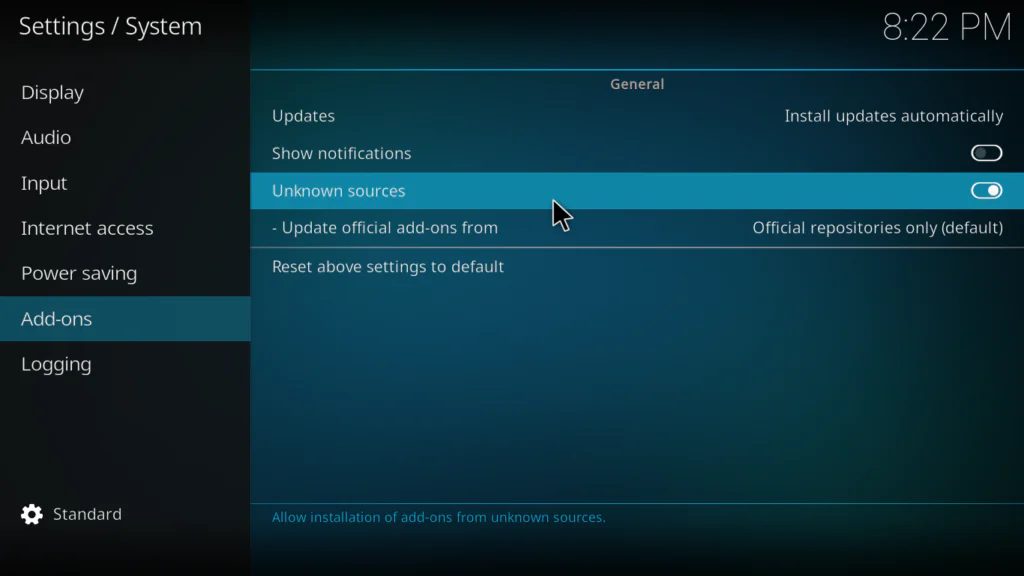
You’re all set. Unknown Sources is now active and Kodi will allow you to install addons from external repositories.
How to Install Dream Machine Addon on Kodi
The installation has three straightforward stages: adding the source URL, installing the repository, then installing the addon from within that repository. Take it one step at a time and you’ll be done in under five minutes.
Step 1 — Add the Repository Source URL
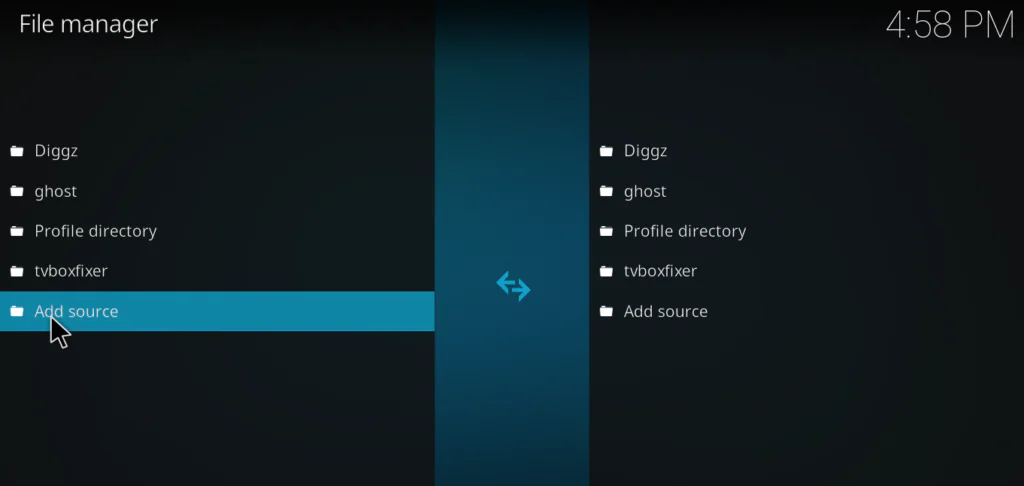
1. From the Kodi home screen, navigate to Settings → File Manager.
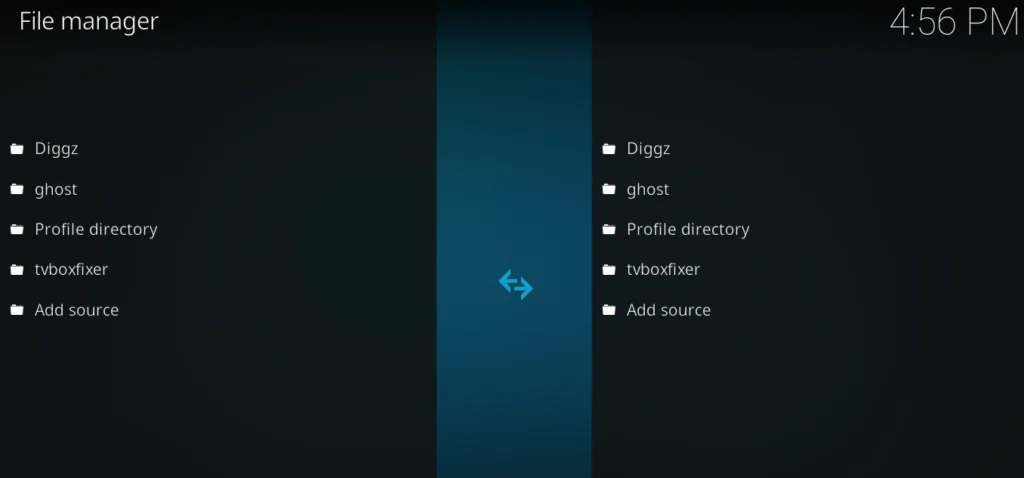
2. Double-click on Add Source.
3. Click <None> and enter the Dream Machine repository URL. Always check the addon’s official GitHub page or the Kodi community forums for the most current, working repo URL — these occasionally change between updates.
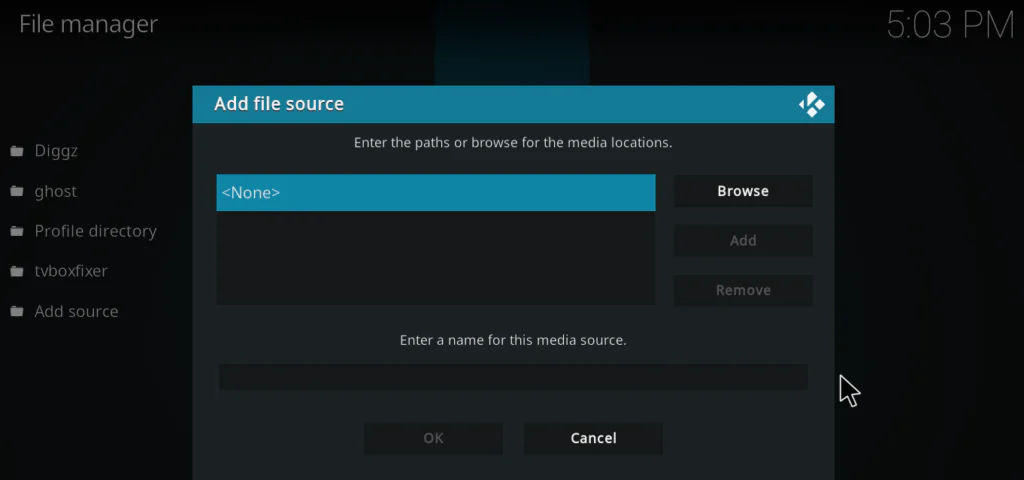
4. In the name field below the URL, type DreamMachine (or any name you’ll remember easily). Click OK to save.
Step 2 — Install the Repository
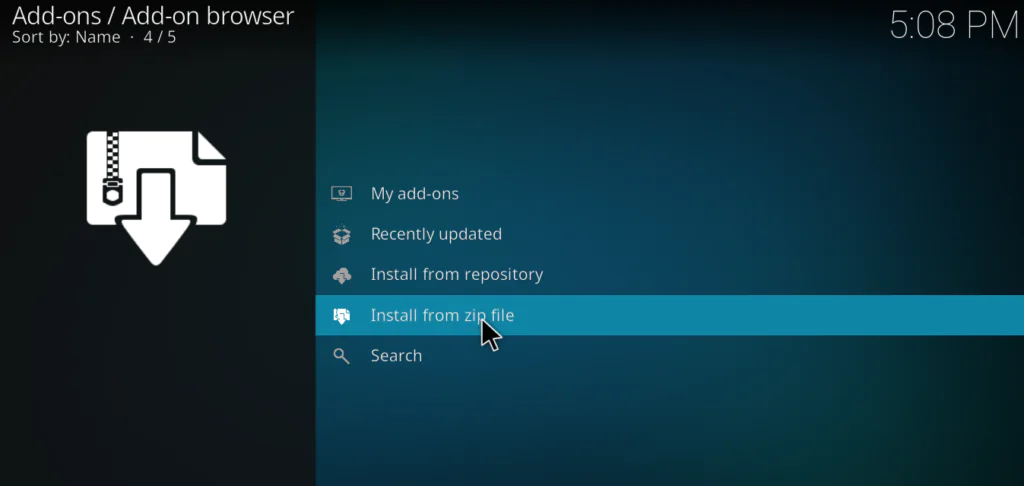
1. Return to the Kodi home screen. Click Add-ons in the sidebar, then click the open box icon at the top left corner of the screen.

2. Select Install from zip file.
3. Locate and select DreamMachine from the list — this is the source you added in Step 1.
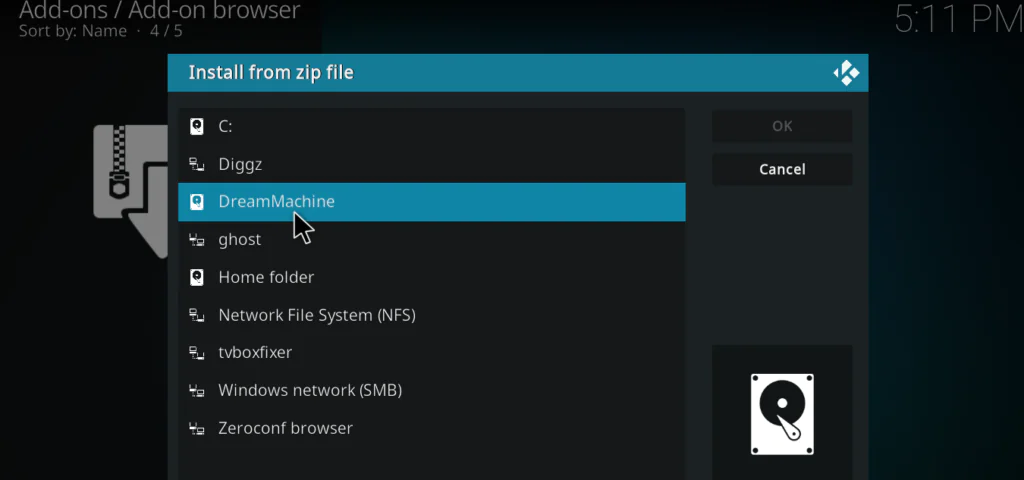
4. Select the repository zip file inside it and wait for the “Add-on installed” notification to appear in the top-right corner of the screen.
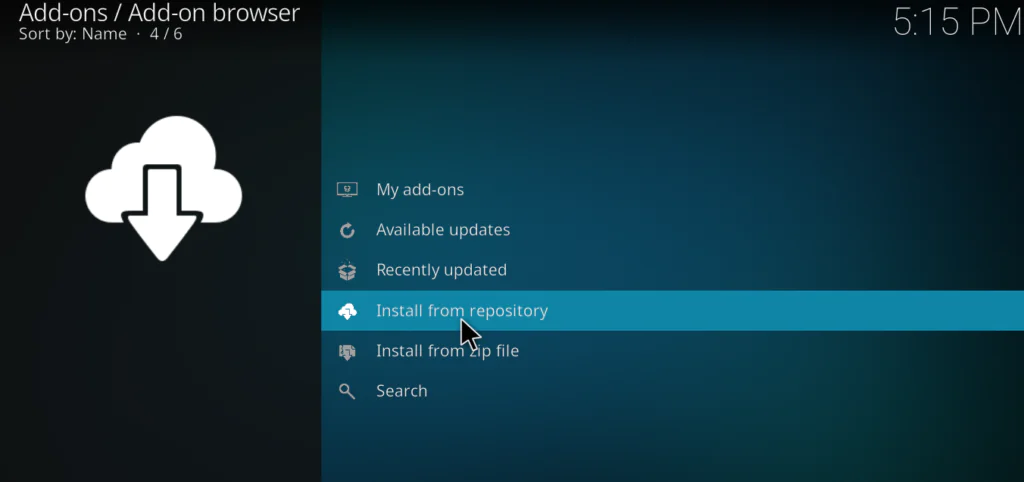
Step 3 — Install the Dream Machine Addon
1. Still inside the Add-on browser, this time select Install from repository.
2. Select the Dream Machine Repository from the repository list.
[Insert Image: Repository selection screen with Dream Machine Repository visible in the list]
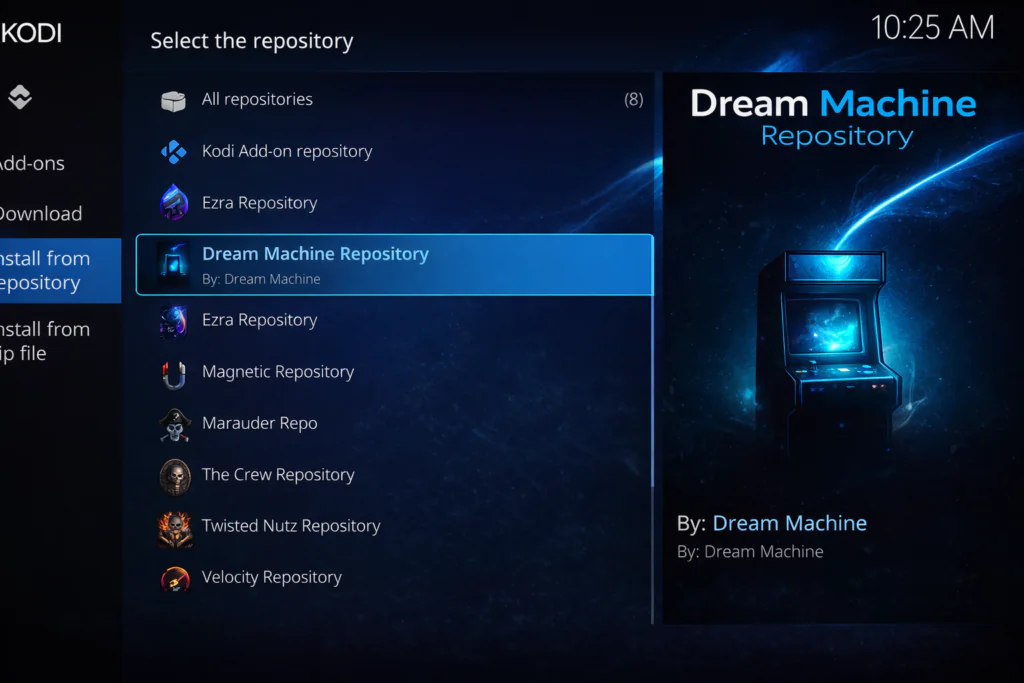
3. Navigate to Video add-ons, find Dream Machine in the list, and click Install.
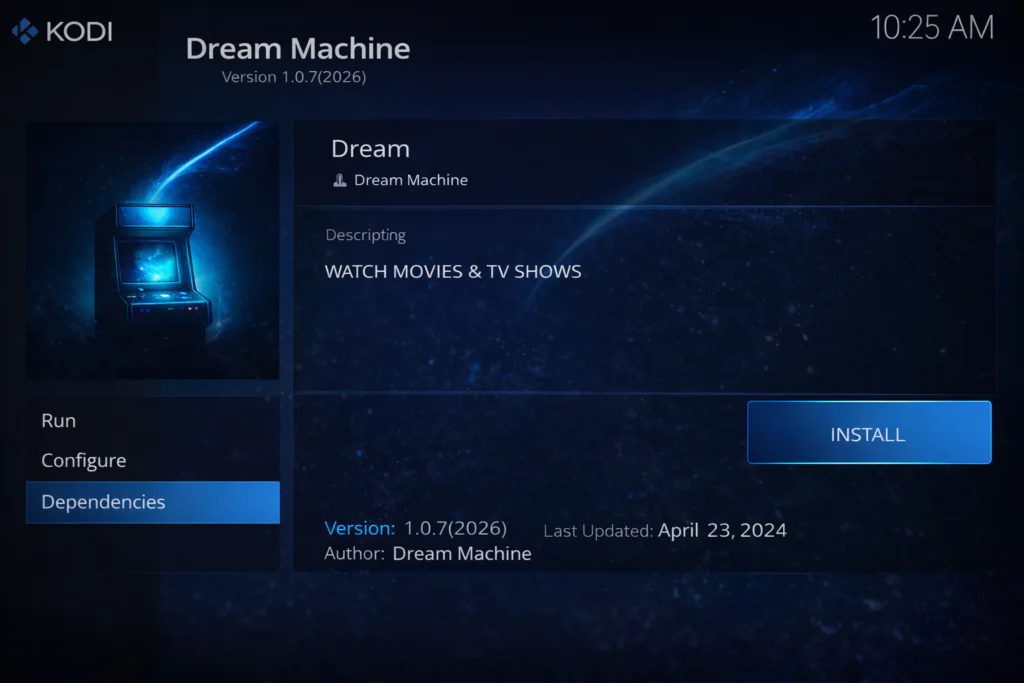
4. Wait a few seconds for the “Dream Machine Add-on installed” notification to confirm the process is complete.
That’s the full install Dream Machine Kodi process done. You’ll now find it listed under Add-ons → Video Add-ons on your home screen.
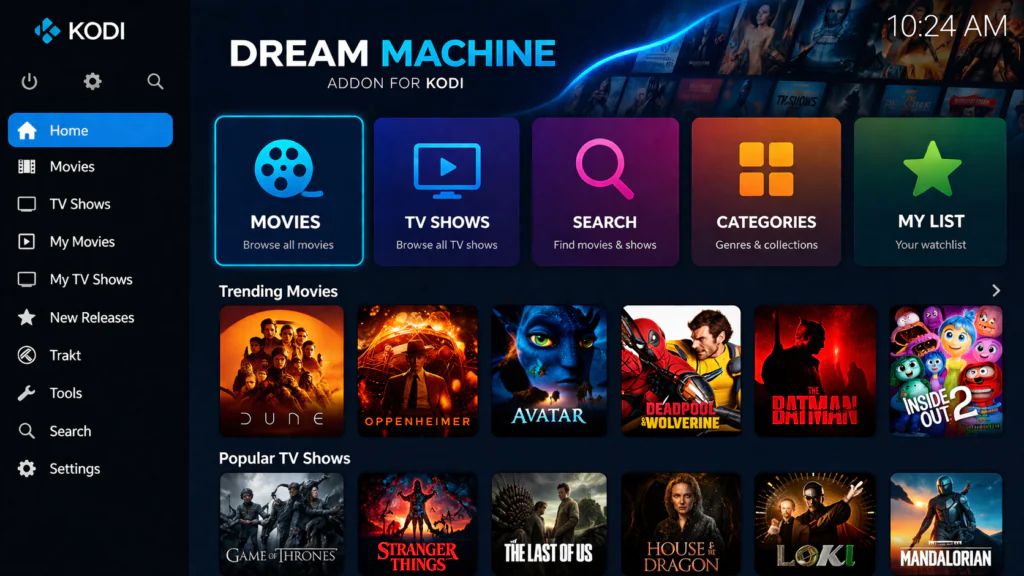
How to Use the Dream Machine Addon
Open Dream Machine from your Video Add-ons section. The main menu is clean and easy to follow right away.
Here’s what you’ll find in the main navigation:
- Movies — Browse by genre, year, trending titles, or use the search function
- TV Shows — Full series organized by season and episode
- My Lists — Syncs with your Trakt account if connected
- Search — A quick universal search across all available content
To watch something, click on the title and you’ll see a list of available stream sources. With Real-Debrid set up, higher-quality options (1080p and above) will appear near the top. Without it, scroll through the list until you find a working link — there are usually several per title.
For a deeper look at how to get the most out of your setup, our guide on best Kodi settings for Android TV boxes covers performance tuning, cache adjustments, and buffering fixes in full detail.
My Honest Experience With Dream Machine
I’ve installed and tested a fair number of Kodi addons, so I’ll give you a straight take rather than a polished pitch.
Speed: Scraping results typically load within 10 to 20 seconds. That’s perfectly acceptable for daily use. It’s not the fastest addon out there, but it’s consistently faster than a lot of older alternatives I’ve tried.
Streaming Quality: With Real-Debrid linked, quality is genuinely good — I was pulling consistent 1080p streams on a standard 50 Mbps connection without any issues. Without Real-Debrid, results are more variable. You’ll find working streams, but quality can range from SD to HD depending on what’s available at the time.
Buffering: On free stream sources, I did hit occasional buffering during peak hours. This is fairly typical for addon-based streaming and isn’t unique to Dream Machine. Adjusting cache settings (covered below) noticeably helps with this.
Interface: It’s one of the cleaner addon interfaces I’ve used recently. Everything is logically laid out, nothing feels cluttered, and a first-time user won’t feel lost. That counts for a lot when you’re recommending something to beginners.
Verdict: If you pair Dream Machine with Real-Debrid, it becomes a very capable daily-use addon. As a free-only setup, it’s still worth having — just set your expectations accordingly.
Dream Machine Kodi Addon — Pros and Cons
Pros
- Clean, intuitive interface that works well for beginners
- Solid content variety across both movies and TV shows
- Faster scraping than many comparable addons
- Real-Debrid and Trakt integration built in
- Actively maintained with regular updates
Cons
- Without Real-Debrid, free stream quality can be inconsistent
- Occasional broken or unavailable links
- Requires a reliable internet connection for smooth playback
- Repository URL may change after updates, requiring a reinstall
Best Settings for Better Performance
If you want to get the smoothest possible experience from the Dream Machine Kodi addon, a few quick settings adjustments make a real difference.
1. Increase your cache size Edit (or create) the advancedsettings.xml file in your Kodi userdata folder and set the cache to at least 500MB. This reduces buffering significantly during longer playback sessions. Kodi’s official wiki has a clear guide on how to do this if you’ve never edited that file before.
2. Connect Real-Debrid Inside the Dream Machine addon settings, go to Accounts and link your Real-Debrid account. This one change has more impact on stream quality than any other setting. Premium resolvers consistently outperform free hosters for reliability and resolution.
3. Disable slow or unused providers In the addon’s scraper settings, you can toggle individual providers on or off. Disabling ones that regularly return dead links speeds up your search results noticeably.
4. Use a wired Ethernet connection where possible If your streaming device is close to your router, a direct cable connection over Wi-Fi makes a meaningful difference in stream stability — especially for 1080p or higher content.
Conclusion
The Dream Machine Kodi addon is one of the more polished and beginner-accessible options available in 2026. The three-step installation process — source, repository, addon — follows the same pattern as most Kodi addons, and once you’ve done it once, it becomes second nature.
Real-Debrid users will get the best experience out of it, but even without a premium account, Dream Machine offers enough working streams and a clean enough interface to be worth installing. If you’re putting together a solid Kodi setup from scratch, this addon deserves a spot on your list.
Worked through the install Dream Machine Kodi guide without any issues? Or hit a snag somewhere along the way? Drop a comment below — happy to help you sort it out.