Introduction
If you already have Kodi installed, you’re sitting on one of the most flexible media tools out there. And one of the best things you can do with it? Set up IPTV. 📺
IPTV lets you stream live TV channels, sports, and on-demand content through an internet connection — all inside Kodi’s clean interface. Once it’s set up, it genuinely feels like having a proper TV service on any device.
This guide shows you exactly how to set up IPTV on Kodi from scratch. Simple steps, no fluff.
What You Need Before You Start
Before jumping in, make sure you have everything ready:
- ✅ Kodi installed on your device — if not, check out our guide on how to install Kodi on TV to get started
- ✅ A legal IPTV subscription from a legitimate provider
- ✅ Your M3U playlist URL (provided by your IPTV service)
- ✅ A stable internet connection (at least 10 Mbps recommended for HD streaming)
- ✅ The latest version of Kodi — download it from kodi.tv if you need to update
Got all that? Good. Let’s get into it.
How to Set Up IPTV on Kodi — Step by Step
Kodi handles IPTV through a built-in add-on called PVR IPTV Simple Client. It’s already included in Kodi — you just need to enable and configure it.
Step 1: Enable the PVR IPTV Simple Client

- Open Kodi on your device
- Go to Add-ons from the main menu
- Click the box icon at the top left (My Add-ons)
- Select PVR Clients
- Find PVR IPTV Simple Client and click on it
- Hit Enable
That’s the add-on activated. Now let’s connect your IPTV playlist.
Step 2: Open the Add-On Settings
- After enabling, click Configure (or go back to PVR IPTV Simple Client and select Settings)
- You’ll see a settings panel with a few tabs
- Stay on the General tab — this is where you add your playlist
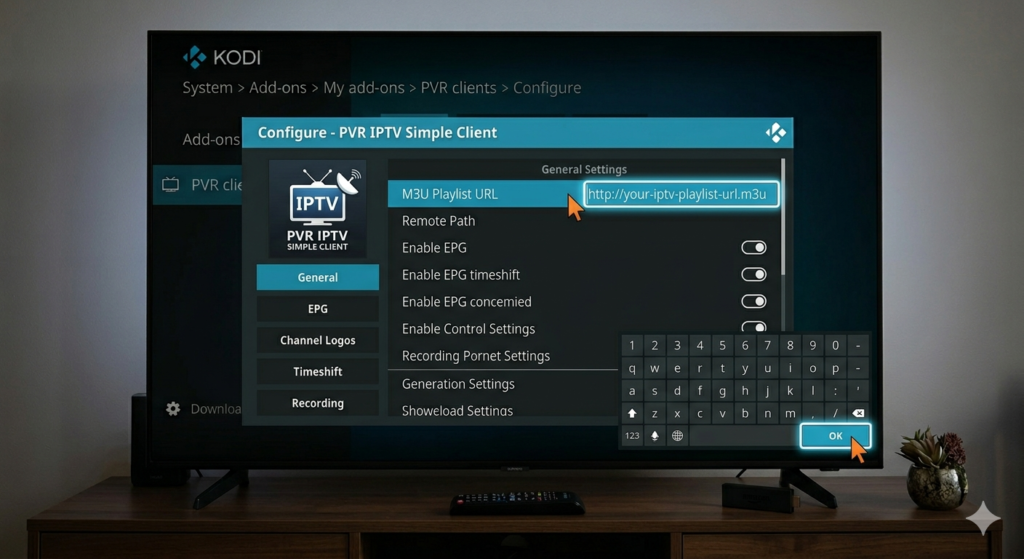
Step 3: Connect Your M3U Playlist
This is the step that actually connects Kodi to your IPTV channels.
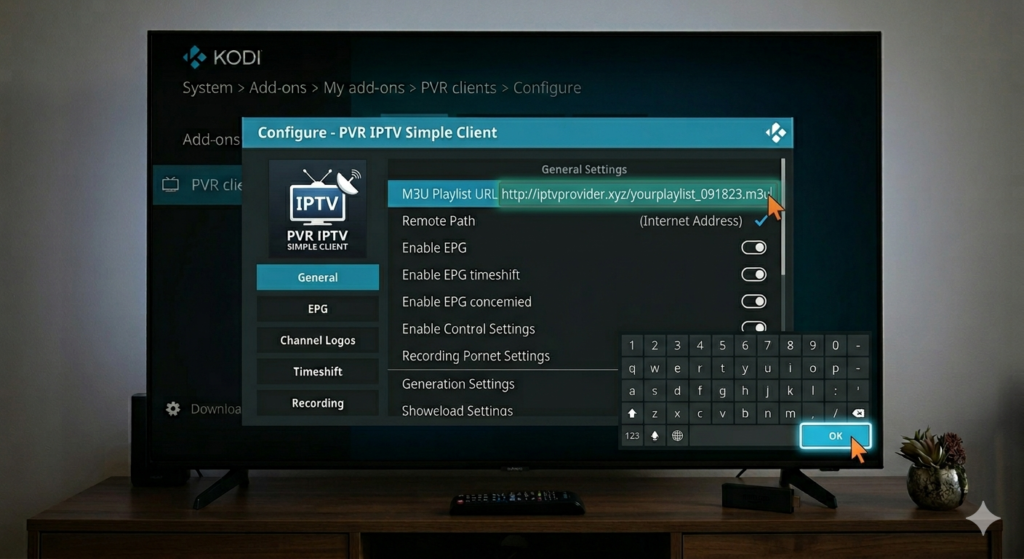
- Under M3U Playlist URL, select Remote Path (Internet Address)
- Paste your M3U URL from your IPTV provider into the box
- Click OK to save
If your provider gave you a local file instead of a URL, choose Local Path and browse to the file on your device.
Step 4: Restart Kodi
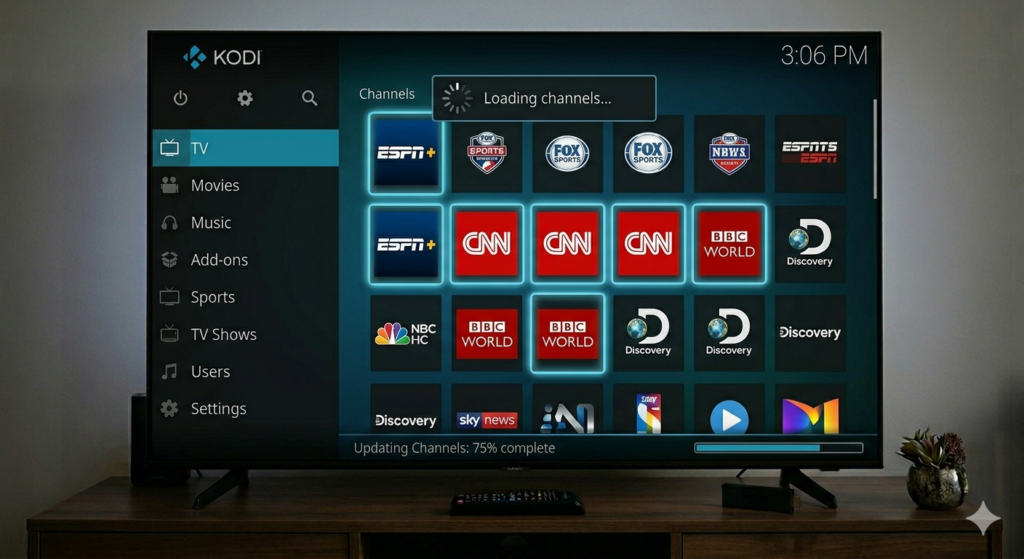
- Close Kodi completely
- Reopen it
- Go to TV from the main menu — your channels should now be loading
Give it 30–60 seconds to fetch all the channels. Once it’s done, you’re live. 🎉
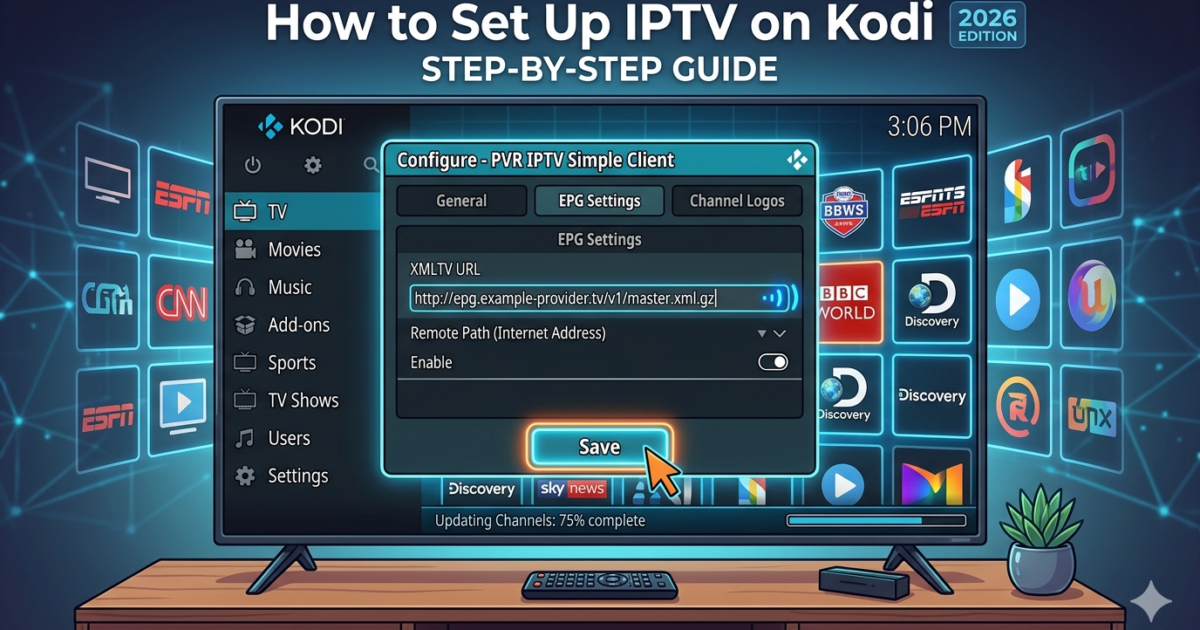
How to Add an EPG (Electronic Programme Guide)
An EPG gives you a proper TV guide so you can see what’s on and when. Not all IPTV providers include one, but if yours does, here’s how to add it.
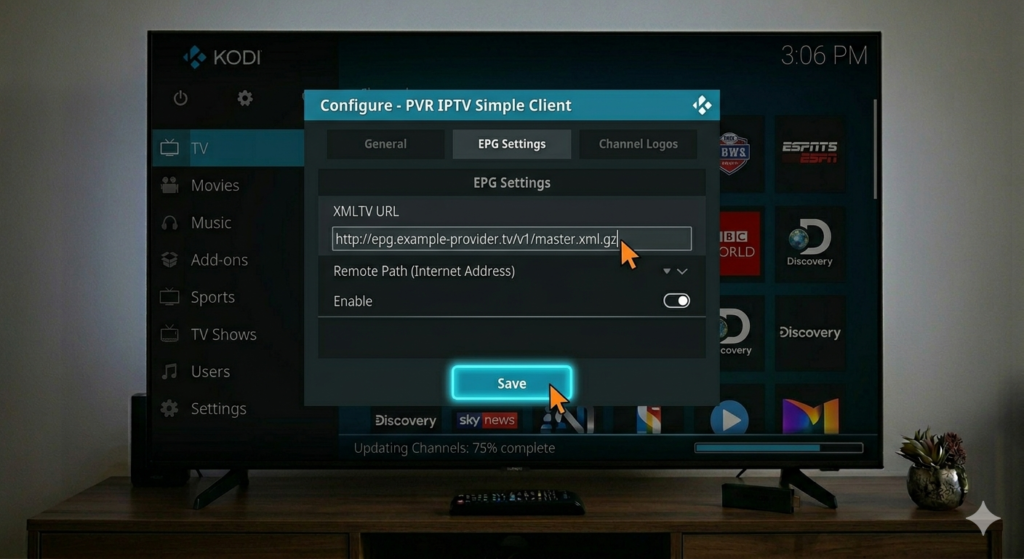
- Go back to PVR IPTV Simple Client → Configure
- Click the EPG Settings tab
- Under XMLTV URL, paste the EPG URL from your provider
- Save and restart Kodi
Once it loads, you’ll have a full on-screen TV guide — just like a real cable package.
Common Problems and Quick Fixes
Even when everything is set up right, things don’t always go smoothly. Here are the most common issues:
- “No TV channels found” → Double-check your M3U URL — even one wrong character breaks it. Copy and paste it fresh from your provider.
- Channels load but won’t play → Your internet speed might be too slow. Try restarting your router or switching to a wired connection.
- Kodi freezes or buffers constantly → Clear Kodi’s cache and close any background apps on your device.
- EPG not showing → It can take up to 24 hours to fully load after first setup. Be patient and restart Kodi again.
- Add-on not showing in PVR Clients → Make sure you’re running the latest version of Kodi. Older versions sometimes hide this add-on.
My Personal Take on IPTV and Kodi 💬
I want to be upfront about something — because I think it matters.
IPTV has a bit of a grey reputation online, and honestly, a lot of that comes from people using it the wrong way. There are services out there offering hundreds of channels for almost nothing, and while that might sound tempting, most of those are illegal. They stream content without paying the rights holders, and using them puts you at legal risk.
I’ve tried to be clear throughout this guide: only use IPTV with a legitimate, paid subscription from a legal provider.
It’s not just about the law either. It’s about fairness. The people who make the shows and sports broadcasts you love depend on that revenue. Using a pirated service is a direct hit to their income — and I’m not comfortable recommending that to anyone.
Kodi is a brilliant tool. The PVR IPTV Simple Client is genuinely impressive. Use them the right way and you’ll have a media setup most people would pay good money for. No shortcuts needed.
Conclusion
Setting up IPTV on Kodi is honestly easier than most people expect. Once you have a legal M3U playlist and the PVR IPTV Simple Client configured, you’re just a restart away from a fully working live TV setup inside Kodi.
Take your time with the M3U URL — that’s the part where most people slip up. Get that right and the rest falls into place. Enjoy your streams! 📺
FAQ
Q: Is IPTV legal on Kodi? IPTV itself is legal when you use it with a legitimate subscription. Kodi is just the player — it’s the content source that determines legality.
Q: Do I need a subscription to use IPTV on Kodi? Yes, to access live TV legally you need a paid subscription from a legitimate IPTV provider who holds the rights to the content.
Q: What is an M3U playlist? It’s a file or URL that contains a list of your IPTV channels. Your IPTV provider sends you this link after you subscribe.
Q: Why are my IPTV channels buffering on Kodi? Usually it’s a slow internet connection or a server issue on your provider’s side. Try a wired connection and restart Kodi to improve performance.
Q: Can I use IPTV on Kodi without a subscription? There are free, legal IPTV services available — like Pluto TV or Plex’s live TV section — but these have limited channel selections. For a full channel lineup, a paid legal subscription is the way to go.
📌 Related Guides
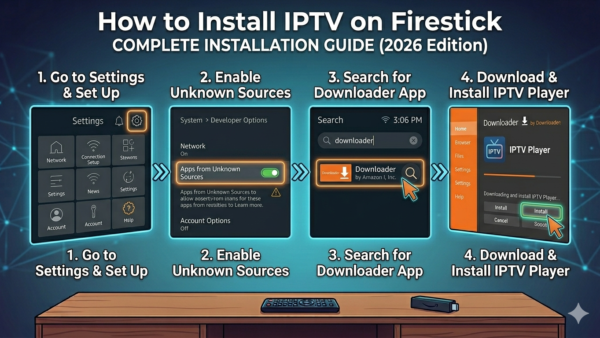
How to Install IPTV on Firestick (Step-by-Step Guide 2026)
Introduction Let’s get into it The Amazon Fire TV Stick is already a great streaming device. But once…

Is Kodi Legal? (Honest Answer 2026)
Meta Description: Is Kodi legal? Get a clear, honest answer in 2026. Learn when Kodi is safe and…
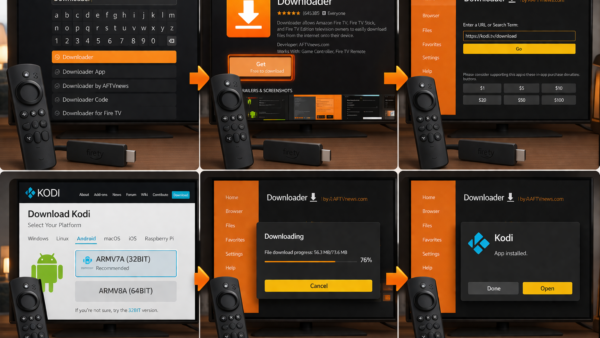
How to Install Kodi on Firestick (2026) – Easy 5-Minute Setup
Introduction Kodi is one of the best free media players out there — and yes, it works great…