How to Flash X96 Mini with SlimBOX ATV9 — 2026 GuideHow to Flash X96 Mini with SlimBOX ATV9 Custom Firmware
Fix slow performance, unlock Google Play Store, and get a clean Android TV 9 experience — completely free. Step-by-step guide with real screenshots.

Why Flash Your X96 Mini with Custom Firmware?
The X96 Mini ships with a heavily modified Android firmware that causes serious problems over time: slow navigation, app crashes, missing Google Play Store, and poor media playback. Flashing SlimBOX ATV9 replaces this with a clean, optimized Android TV 9 build.
- Faster, smoother performance
- Clean Android TV 9 interface
- Full Google Play Store access
- Google Assistant built in
- Chromecast support
- Regular firmware updates
- Voids manufacturer warranty
- Process is fully reversible
- Requires a Windows PC
- Specific USB cable needed
- All data will be erased
What You Need Before Starting
| Item | Details |
|---|---|
| X96 Mini TV Box | Amlogic S905W version — check the label on the bottom |
| Windows PC | Windows 7, 10, or 11 — Mac does NOT work |
| USB-A to USB-A Male Cable | Both ends must be identical Type-A male plugs |
| SlimBOXtv 9.20 Firmware | .img file extracted from ZIP (~1.4 GB) |
| Amlogic USB Burning Tool | v2.1.7.3 recommended for Android 9 |
| Toothpick or SIM pin | To press the hidden recovery button in the AV port |
The #1 reason flashing fails is the wrong USB cable. You need a USB-A Male to USB-A Male cable — both ends look identical. A regular phone charging cable will NOT work.
Find the X96 Mini Firmware on SlimBOXtv
Open your browser and go to slimboxtv.ru. In the top navigation bar, hover over “ПРОШИВКИ” (Firmware). In the dropdown, scroll to S905W and click X96 Mini.


Review the X96 Mini Firmware Details
You will land on the X96 Mini page. Verify the CPU matches your device before downloading anything.


- Flash entirely at your own risk — the team takes no responsibility
- Back up apps with Alpha Backup and system data with TWRP first
- Do NOT share or redistribute this firmware on other websites
Download the SlimBOXtv Firmware
Scroll down the X96 Mini page to find the download section. Click the download button — it opens Yandex Disk. Choose the ATV version for Google Play Store access.


If you see a limit message, click “Сохранить на Яндекс Диск” to save to a free Yandex account first, then download.

Download Amlogic USB Burning Tool
Scroll to the bottom of the slimBOXtv page to find the Burning Tool download links. For SlimBOXtv 9.20 (Android 9), download v2.1.7.3.


Install the Amlogic USB Burning Tool
Extract the ZIP and run the installer. Click through the setup wizard — it is straightforward.

Open the Tool & Switch to English
Launch the Burning Tool. It opens in Chinese by default. Click the third menu item (语言 = Language) and select English.


Load the Firmware Image File
Click Setting → Load Image. Browse to your extracted firmware .img file and click Open.


Put X96 Mini into Recovery Mode & Flash
- 1Power off your X96 Mini — unplug the power adapter completely
- 2Connect the USB-A to USB-A cable from your PC to the X96 Mini USB port
- 3Find the tiny reset button inside the AV port on the back of the device
- 4Use a toothpick to press and hold that reset button firmly
- 5While holding, plug in the power adapter — hold for 3–5 seconds then release
- 6The device appears in the Burning Tool — click Start
- 7Wait for the progress bar to reach 100%

- Status shows “100%: Burning successfully” in green
- Error counter remains at 0
First Boot into SlimBOX ATV9
Click Stop, disconnect the USB cable, connect HDMI to your TV, then plug in power. First boot takes 3–7 minutes — do not unplug.


Verify Firmware & Install the Latest Patch


📋 Complete Process at a Glance
Your X96 Mini now runs SlimBOXtv ATV 9.20 — a clean, optimized Android TV 9 experience with Google Play Store, Google Assistant, and regular firmware updates from the slimBOXtv team.
📌 Related Guides
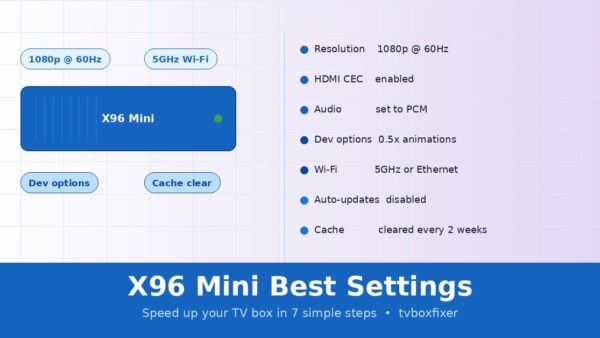
Best Settings for X96 Mini to Boost Speed (No Lag Guide 2026)
Looking for the best settings for your X96 Mini? You’re in the right place. In this guide, we’ll…
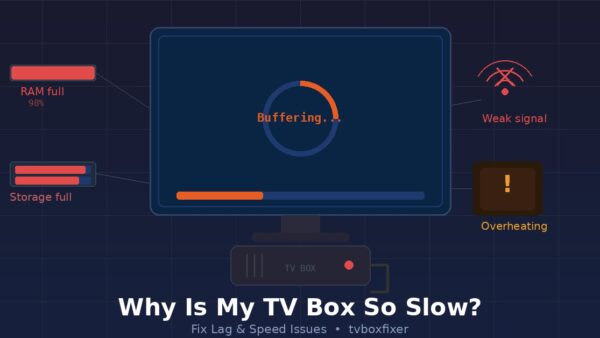
Why is My TV Box So Slow? (Fix Lag & Speed Issues)
Why is My TV Box So Slow? (Fix Lag & Speed Issues) If your TV box is crawling…